Showing posts with label Cake. Show all posts

Friday, 6 July 2012

Present Birthday Cake

So those of you who know me know that it was my birthday about 3 weeks ago and I’ve finally got around to posting about the cake I made for my birthday! After seeing some cakes online that were decorated to look like presents I’ve been dying to make one so my birthday was obviously the perfect opportunity. My lovely friends gave me some Lakeland vouchers for my birthday and so I used some of them to buy this great square tin with moveable sides so you can make it any size square/rectangle you like, pretty good huh?
While I may have splashed out on a tin, I did not buy myself any icing as I had some odds and ends in my baking cupboard so I used them up. Unfortunately I didn’t have enough white to cover the whole cake so it’s very thin and patchy so ignore that in the pictures but the main thing I wanted to do was the bow on top. I watched a quick online tutorial and found out that it’s quite straightforward and you get a great result with a simple method. This is the bit that I’m most pleased with and as it was my first attempt, it can only get better!
The cake itself was just a plain Victoria Sponge mix using 6 eggs in total which made an 8in square cake. I also bought a cake leveller which I used to slice my block of cake in half to put jam in the middle and also to level off the top slightly so that it wasn’t so domed. The cake took a lot longer in the oven than anticipated so unfortunately the edges got a little dry so I’ll have to work to improve that next time but I was very pleased with my first present cake.
My work with regal ice and sugar paste is definitely improving through practice and I’m starting to love celebration cakes more and more. The next one you’ll see here will be a champagne cake which a lovely lady at work has asked me to make for her husband’s 50t birthday. Eek!

Sunday, 27 May 2012

Vegan Chocolate Cake

This is one of the most amazing chocolate cakes I’ve ever eaten! First tried when my friend Rose made it for my birthday last year and last eaten for hers the following month, I decided that it was finally time to make it myself. I’ve also been asked to make a chocolate cake for someone in a week’s time so thought it would be a good idea to have a practise and it’s pretty lucky I did! I’m not sure of the origins of this recipe I just took it from Rose but I do know it was originally in cup measurements which is why all the quantities appear slightly odd.
For making the mixture this recipe is ridiculously simple. Whack it all in a big bowl and beat with an electric handmixer until smooth, job done. You then transfer it to the tins you wish to bake it in. I used two 9inch cake tins but I know Rose has used a square one before and that as worked fine also! Now. Here comes the part where I tried to follow the recipe but just couldn’t bring myself to do it!
The recipe says leave in the oven for 20minutes without opening it at all and then the cake is done. Rose did say to me it would still be moist so I was prepared for that however all but the edges of my cake were still liquid and I just couldn’t take it out like that! So I cooked it for 10 more minutes and then took it out but I must admit, it was still totally soft in the middle. Way beyond anyone’s definition of the word ‘moist’. I then left it to cool of about 10mins before I tried to take it out. ERROR! I basically put my hand through the cake and the liquid inside went everywhere.

After consulting with Rose, it transpired that you’re supposed to leave it in the tin to cool completely before removing the cake which I never ever do and she always always does! I left the other layer in the tin to cool and while it sunk slightly (again, apparently normal!) it did come out without creating a giant hole in the middle. To try and create something yummy out of my mistake I sandwiched the two cakes together with vegan buttercream and filled the hole on top with strawberries. It tastes delicious so while this time was far from perfect, I at least know where I went wrong!

Here is the recipe:

186g butter
450ml soya milk
3 tbsp golden syrup
1 ½ tsp bicarbonate of soda
374g self raising flour
74g cocoa powder
374g caster sugar

Preheat the oven to 180°C and grease and baseline your tins of choice

Mix all the ingredients together in a large bowl until you have a smooth batter. Put the mixture in your tins and shake

Lick Your Spoon!

Bake in the oven for at least 20minutes, bake longer at your own discretion! But do not open the door during these first 20 minutes

LEAVE TO COOL IN TIN - very important!

Then ice and decorate how you want!

Wednesday, 2 May 2012

Mini Victoria Sponges

These are so cute! I saw the tin to make these ages ago and thought they were a great idea, perfect for tea parties! I finally bought it the other week and so decided to try it out this weekend. The tin is by My Kitchen and is available from Lakeland. I got it as part of their buy one get one half price offer or else it’s a little expensive for a tin!
After reading the reviews on the website I found a post that said a 3 egg mixture was the right one for this tin so that’s what I used. If you use this tin make sure you grease the holes really well or else the loose bottoms will take the bottoms off the cake. Also be careful you make sure the loose bases are properly centred or else some of the mixture will fall through the bottom which you can see happened to one of mine!
I originally anticipated that each cake would be a layer so 12 holes would make 6 mini cakes. They rose a lot higher than I thought so I cut the tops off to make them flat. In hindsight, I think I should have tried cutting each cake in half and sandwiching it back together and so made 12 cakes as the 6 I made are pretty high! I just used jam in between mine and a sprinkle of icing sugar on top, keeping it simple but you can always add some buttercream or even fresh cream to make it a bit fancier.
I love the idea of these but am not totally satisfied with the outcome just yet so this is something I’m definitely going to be working on as I do think this bake is perfect for an afternoon treat with a cup of tea!

Friday, 13 April 2012

Mango Bread

This is an amazing recipe. I’m just gonna put it out there from the start that this is fantastic. I’ve always really liked the idea of banana bread but as soon as bananas go yellow and start going soft and tasting like, well, bananas I don’t like them and so consequently, I do not like banana bread. Mango bread on the other hand is genius! Mangos are definitely one of my favourite fruits so when I came across this on Kitchen Runway I just had to try it! Its so good I’m going to make it again this weekend as I’m eating the last piece of it as I type this [with a cup of Lady Grey tea, perfection!]
My loaf was much bigger and paler than the recipe I was following, I think 2 smaller loaf tins were used, or perhaps one longer one than I was using. I used a 2lb silicone loaf tin. If you haven’t got a loaf tin and are looking to buy one I would not recommend silicone ones at all. Once they are full, which tends to happen when you put mixture in them to cook, they spread sideways in the middle meaning you don’t get a nice, neat loaf shape. You get a splodge in the middle of you loaf-ish shape. A metal one will make sure your loaf keeps in shape and I think improves the cooking.
My pictures really don’t do the finished product justice. You should look at the picture on the blog where I found the recipe as they are much better! The cake stays really moist for a long time (but it was only in our house 5 days before it was gone!) and the mango adds a great texture to the loaf. The bright orange fruit is also quite aesthetically pleasing and did I mention it tastes great?! While mango can sometimes be a bit expensive, it’s definitely worth it and it does make quite a big loaf.

Please try this!!

Here is the recipe:

2 cups plain flour
2 tsps baking powder
1 cup sugar
2 tsp cinnamon (I left this out)
3 eggs
1 tsp vanilla extract
½ cup butter, melted
¼ cup oil
2 ripe mangoes, chopped

Preheat oven to 175°C

Sift flour into a large bowl.  Add baking soda, sugar and cinnamon and stir the dry ingredients to combine

In a medium bowl, beat eggs, add vanilla extract, melted butter and oil.  Combine the ingredients and add to dry ingredients

Using a rubber spatula or wooden spoon stir to combine the wet and dry ingredients.  Fold in the finely chopped mangoes

Pour batter into a greased loaf pan and bake for 55 – 60 minutes or until inserted toothpick comes out clean

Lick Your Spoon!

Let cool in pan for 10 minutes.  Remove bread from pan and cool on cooling rack

Monday, 9 April 2012

Death By Chocolate

Happy Easter! I hope everyone has enjoyed the lovely long bank holiday weekend and those of you who gave something up for lent, well done! I hope it all tastes extra good now. As you know I gave up chocolate and so my recipes were chocolate-free too, but no more! Another recipe taken from my Great British Book of Baking, this is the chocolatey-est thing I’ve ever made with a total of 500g chocolate in it and 100ml double cream for added heart-attack factor, the very aptly named, Death by Chocolate. Then of course because it’s Easter I put some mini eggs on top.
This is an interesting recipe in that it uses no flour at all. The only dry ingredient is sugar as you melt the chocolate. I must say it does require rather a lot of patience for each stage of the process. Melting the chocolate and butter over hot water in a pan can be a little time consuming but it is important not to rush it or let the water boil as that will spoil the chocolate. This is definitely not a recipe to make if you do not have an electric mixer of some kind. In the recipe it says that it takes about 5 minutes on the highest speed to turn the eggs and sugar into a thick mousse. Well I can only imagine that this was in an amazing free standing mixer because it took me about 20minutes to reach the desired consistency with my handheld one. And finally, when mixing the chocolate into the eggy mousse you need to be careful to make sure all the chocolate is incorporated while also not disturbing the mousse it took so long to achieve!
It is advised that you use good quality chocolate as this is essentially the main ingredient and there is no cocoa or anything to mask the taste. I used Green and Black’s dark cooking chocolate for mine and it’s rich but delicious! The recipe says 35-45 minutes in the oven but I only left mine in for 30minutes as it was cooked enough then. After leaving it for about 25 minutes to cool completely I then prepared the chocolate ‘icing’. I use the term icing lightly as really it is just melted chocolate with cream in it. The recipe says to pour the mixture over and let it drip down the sides which suggests it’s very messy but the mixture is quite thick so doesn’t really fall unless you push it.

To finish it off and give it an Easter touch I put a circle of mini eggs all round the edge. Chocolate overdose? You’d think so but actually the cake is so light (as there is no flour in it) that it’s not too intense and it’s more the icing that gives the indulgent flavour. If you’re a chocoholic you’ll absolutely love it!

Here is the recipe by Linda Collister:

For the sponge:
300g good quality dark chocolate
150g unsalted butter, diced
5 medium eggs at room temperature
½ tsp vanilla extract
100g caster sugar

For the topping:
200g good quality dark chocolate
100ml double cream

Preheat the oven to 180°C and grease and baseline a 22cm springclip tin (I used a 23cm one as that’s the only size I have!)

Break up the chocolate for the sponge and put it in a heatproof bowl with the butter. Set over a pan of steaming hot but not boiling water and leave to melt, stirring frequently. [Don’t let the base of the bowl touch the water as this will cause the chocolate to get too hot and spoil.] Once the chocolate has melted, remove the bowl from the heat and set to one side

Break the eggs into a large mixing bowl, add the vanilla and whisk for a few seconds just to break up. Add the sugar and whisk on full power until pale, very thick and mousse-like and about 5 times the original volume. This will take about 5 minutes (or 20 if you’re me!) To test if the mixture is ready, lift out the whisk and if a thick, ribbon-like trail of mixture falls back into the bowl and is still visible after 5 seconds you can stop whisking

Pour the chocolate mixture on to the egg mousse and very gently, but thoroughly, fold the two together using a large metal spoon. Take your time, and make sure there are no pockets of chocolate at the bottom of the bowl

Pour the mixture into the prepared tin and bake in the pre-heated oven for 35-45 minutes until just firm to the touch - the centre should still be slightly moist under the crust, as the cake will continue cooking after it comes out of the oven

Stand the tin on a wire cooling rack and run a round bladed knife around the inside to loosen the sponge. Leave until completely cold before removing from the tin. The cake will rise to the top of the tin during baking but will sink on cooling

Invert the cake onto a serving plate - it is easier to ice the flat base. To make the topping, finely chop the chocolate and put it into a large heatproof bowl with the cream. Set over a pan of hot but not boiling water as before. Leave for a minute until the chocolate is half melted, then remove the bowl from the pan and beat the chocolate until glossy

Pour the topping evenly over the cake and let it trickle down the sides; you can help it a little, tough if you work it too much you will lose the sine. Leave until firm before serving

Saturday, 31 March 2012

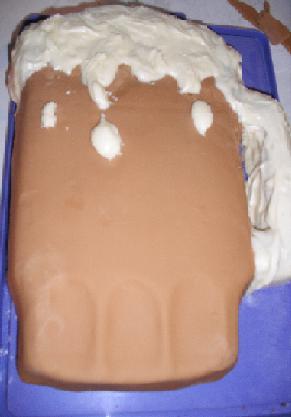
Philip's 21st Birthday Beer Cake

This was another one of my secret baking missions to make something for someone in my house without them knowing. This time it was my for my brother who has just celebrated his 21st birthday. I had a lot of different ideas before I settled on making a Beer Cake. I went to my local cake supply shop and saw the baking tin mould hanging from the ceiling and knew it would be perfect as, shockingly, he rather enjoys beer. Any people who clicked on this thinking this would be an amazing cake with beer in it, I’ll disappoint you now by telling you it’s just an amazing cake shaped like beer!
I thought about doing either an apple or a chocolate cake as the main basis of the cake but I wasn’t sure what quantity of mixture I would have needed. The cake shop recommended a six egg mixture (although I thought they said six ounce so upon making a six ounce mix quickly established it would not be enough and made a second one to put on top!) so I followed my tried and tested Victoria sponge recipe from my mum’s Good Housekeeping recipe book. The cake took quite a while to cook through to the centre so in order to stop the cake burning I covered it with foil after 30minutes in the oven. Despite greasing the pan within an inch of its life before putting the mixture in it was a bit of a challenge getting it out! I had to get my dad to hold it upside down over a wire rack while I banged on the tin to try and loosen it. Luckily it then gently fell out with zero cake casualties.
After waiting about 30-45 minutes for the cake to cool down enough I started the decorating part of the process. Now I’ve never decorated a big cake before, let alone one shaped like beer but it seemed straightforward enough and I think  I did quite a good job, if I do say so myself. For the main beer part I used one packet of Regalice royal icing in ‘teddybear brown’. I rolled it relatively thinly to ensure it covered the whole area and also so that the moulding on the cake still showed through clearly. For the froth, I made one batch of hummingbird bakery buttercream icing, applied with a spatula and a tea spoon and voila! A cake that looks like beer.

My brother was very pleased with his cake, and so was I, although he did say it was cheating that I used a moulded tin… And while I was worried that the cake might be a little dry after its extensive oven time, it isn’t at all. All in all I think my first foray into the world of cake decorating went quite well and it’s definitely something I shall be doing more of in the future!

Here are the two recipes I used:

Victoria Sponge from Good Housekeeping
175g butter/margarine
175g caster sugar
3 eggs, beaten
175g self-raising flour

Grease and base line 2x 18cm (7inch) tins

Beat the butter and sugar together until pale and fluffy. Add the eggs a little at a time, beating well after each addition. Fold in half the flour using a metal spoon then fold in the rest

Divide the mixture evenly between the tins and level with a knife. Bake in the oven at 190°C for about 20minutes until they are well risen and firm to touch. Leave to cool on a wire rack

Hummingbird Bakery Buttercream Icing
250g icing sugar
80g unsalted butter
25ml milk

Put in a bowl and blend together until it looks like icing!

Then of course, Lick Your Spoon!

Wednesday, 21 March 2012

Lemon Drizzle Cake

So as I’m sure you all know, it was Mother’s Day last Sunday and this cake was part of my present to my mum. She loves lemons (and most fruits) so when I saw this recipe during my Lakeland online browsing (I could spend a fortune in that shop!) I thought it would be perfect! You can find the original recipe here. I, slightly inadvertently, did a minor variation to this because, as you can see from the pictures, I didn't have the usual sugary, hard topping on my cake.
You’re supposed to leave the cake to cool for 15-20minutes before putting the sugary mixture on top and then leave to cool fully in the tin before you move the cake. This is to ensure the sugar doesn’t run straight off and will harden on the cake. I highly recommend using a loose bottom cake tin for this cake which I didn’t have in the right size (20cm is the best size for this recipe).
Consequently, I used a regular cake tin and so had to take it out before putting the sugar mixture on or else I wouldn’t have been able to get it out without ruining it. Not only could I not let it cool in the tin but as the cake was surprise I had to make it in secret which didn’t give me enough time to leave it to totally cool! Instead of settling on the top and hardening, the mixture seeped into the sponge and so left it moist and very lemony, especially on the top.


While it perhaps doesn’t look as pretty, it tasted amazing and as it turns out, my mum doesn’t really like the crunchy bit so it worked out for the best! Everyone else in the family enjoyed it also and it was completely devoured in 2days. I’ll certainly be buying a loose bottomed tin to try it again as Lakeland intended and it’s definitely a recipe for the binder!

Here is the recipe:

200g unsalted butter, softened
175g golden caster sugar
4 unwaxed lemons
3 medium eggs, beaten
200g plain flour
2 tsp baking powder
Pinch of salt
50g almonds (I left these out)
2 tbsp milk
5 tbsp granulated sugar

Preheat your oven to 180°

Cream together the butter and caster sugar until pale, light and fluffy

Grate the zest from two of the lemons and add to the mixture. Gradually add the beaten eggs, mixing well after each addition

Sift together the flour, baking powder and salt. Using a large metal spoon, fold into the cake mixture, then fold in the ground almonds

Add the milk and the juice from one lemon and mix until smooth

Spoon the mixture into the prepared tin and level wit a palette knife. Bake on the middle self of the oven for 45 minutes or until golden brown and a skewer inserted into the middle of the cake comes out clean. (My cake was still slightly uncooked in the middle when it was already verging on very brown so I covered it over with some foil to stop it colouring further while the middle cooked)

Definitely Lick Your Spoon at this point, the mixture is lush!

Cool the cake in the tin for 15-20 minutes. Meanwhile, squeeze the juice from the remaining lemons and mix with the granulated sugar. Spoon the sugary lemon juice over the top of the warm cake and leave in the tin until completely cool.

OR skewer the top and pour over the sugar mixture to infuse the sponge and leave a glazed top like I did.